|
TRACS HANDHELD INFORMATION
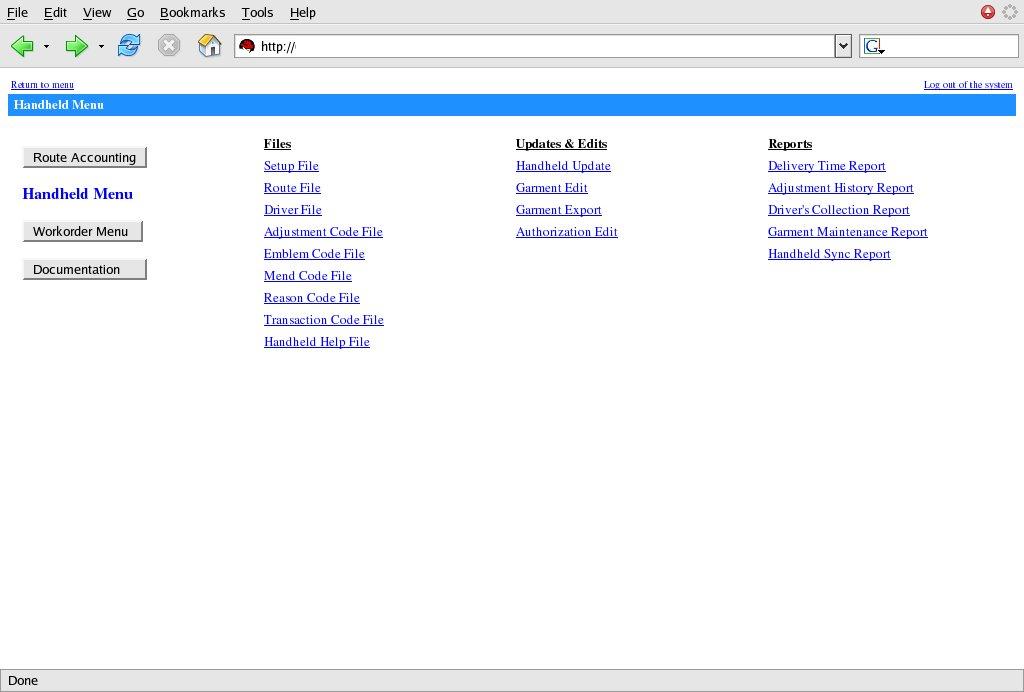
Our Handheld software is a standard add-on package for all of our TRACS customers. The Handheld is comprised of two pieces of software: the software that runs on the handheld itself and browser based software with file maintenance's, updates, and reports. Handheld Route Menu: This screen shows our application, PilotTRACS, as installed along side the other standard applications on the Palm platform. To enter our application, just tap on the PilotTRACS icon.
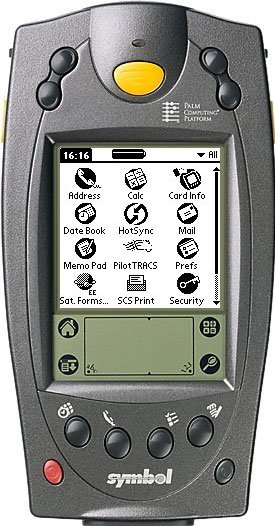
This screen shows the initial PilotTRACS screen which you get after the driver enters his initials (only required on first entry). Tapping the START button here will log the start time for the entire route. A list of invoices, in route sequence, will be displayed when the "Invoices" button is tapped. A Collection Report could also be printed to an IR printer by tapping this button.
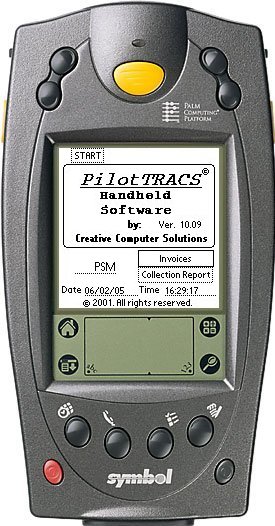
This screen shows the list of invoice numbers, delivery numbers, and customer names (names removed on image). The driver can enter any invoice by tapping the invoice number or scanning a barcode on the invoice from this screen.
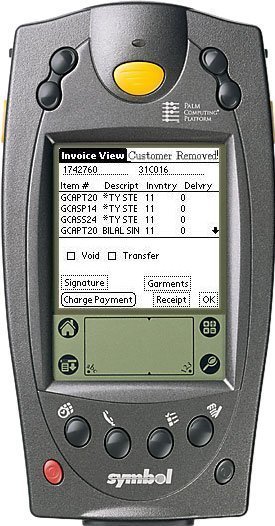
Once this invoice has been selected, it is displayed. You can scroll through the invoice lines by tapping the up and down arrow buttons or by using the up and down buttons on the handheld itself. To edit a particular invoice line, just tap the desired line. This invoice screen also has options to void or transfer the invoice, capture a customer signature, enter garment information, record payments, and print your a receipt. This invoice is charge, so the record payments button is labeled "Charge Payment." On a C.O.D. invoice, the button would be labeled "C.O.D. Payment."
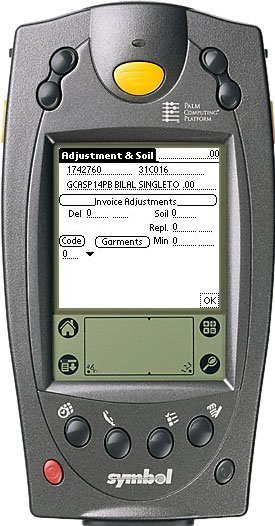
Once a line has been selected for editing, the Adjustment & Soil screen displays. Here you can enter/change delivery, soil, replacement, and minimum quantities as well as enter a code for why the item was changed. Garment information associated with this item may also be entered by tapping the "Garment" button. Tapping the "OK" button here will return you to the invoice screen.
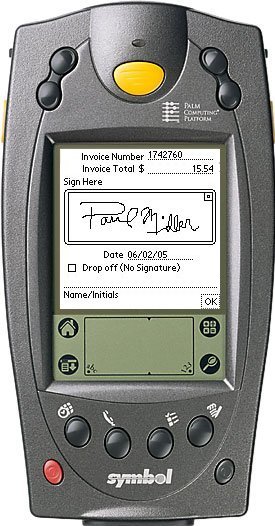
This is the signature capture screen that is displayed when the "Signature" button is tapped from the Invoice screen. The driver may log that it was a drop off without a signature. The signers initials may also be captured if desired. Tapping the "OK" button here will return you to the invoice screen.
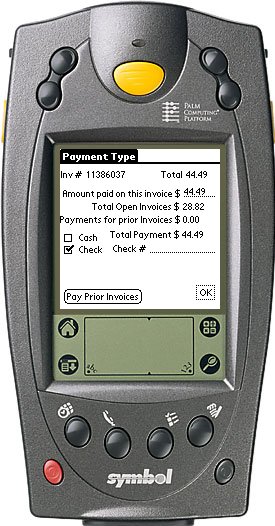
Here is the screen that is displayed when a charge account makes a payment. An amount is entered and then the Check or Cash button is selected. A Check Number field becomes available when Check is selected. Charge invoice payments are automatically applied to the customers oldest invoices until the payment amount is exhausted.
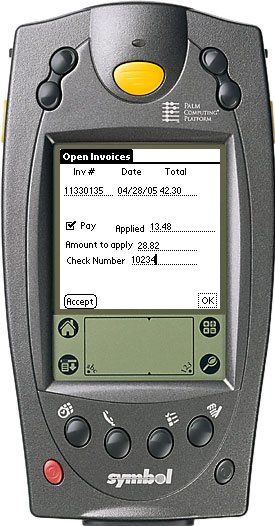
For C.O.D. payments, the following screen is displayed with some additional information. You can select cash or check and if the customer has past unpaid invoices, select which invoice to pay. Tapping the "Pay Prior Invoices" button will display a list of open invoices from which to choose. Select an invoice to be paid by tapping the desired line. `
The screen displays after an invoice is selected for payment. You may choose to apply an amount different from the invoice total. Once all applications have been made on the handheld and they are synced back to the server, the payments will appear on the AR Data Entry Edit report for update.
|